Dutch Oven Baking with Campfire Coals – Beginner’s Guide
There’s something special about cooking delicious food over a campfire. The smoke, the crackling wood, the sizzling meats. Food feels more special to me when I prepare it without all the modern conveniences of a kitchen. Grilling and frying over a campfire is easy enough, but what about baking? Roasted meats, breads, desserts, and nearly anything else you would ordinarily put into your oven at home can be baked in rustic Dutch oven style.
If you’ve never baked food in a Dutch oven before, there is little bit of a learning curve. There is no temperature dial, so you have to get a “feel” for temperatures and time through practice. I use a cheap oven thermometer to get a close idea of how hot my Dutch oven is after preheating, but it’s still only going to give me a rough estimate. Heat will ideally be evenly distributed, but that’s just not always the case when your heat source is a pile of white-hot coals.
Using the Correct Type of Dutch Oven
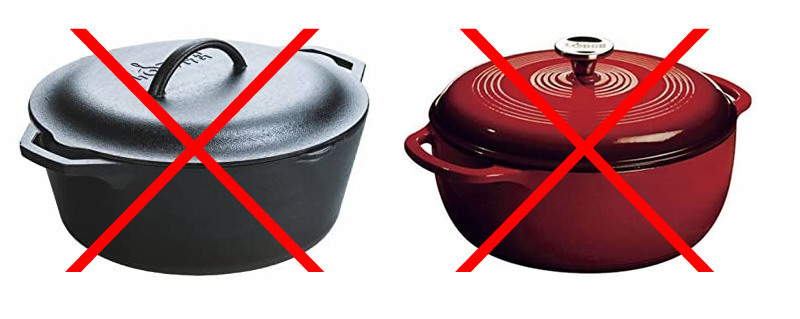
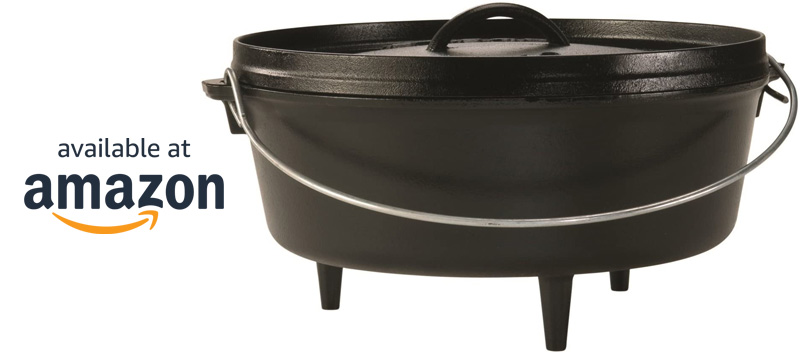
Dutch oven cooking has surged in popularity in recent years, as has the selection of Dutch oven brands and styles. For outdoor cooking with coals, it’s necessary to buy the right type of Dutch oven. You need a solid cast iron oven, with a lid that has a lip around the top outer edge. There are all manner of products labeled “Dutch Oven” that you can find which are not this style. You’ll find versions that are coated in enamel and have convex lids (rounded lids with no lip). Enamel Dutch ovens are meant purely for indoor cooking (putting a Dutch oven into a regular kitchen oven). And if the lid doesn’t have that upper lip, hot coals will just slide right off.
Seasoning
Many entire articles can be written about proper seasoning practices of Dutch oven cookware, but I will keep it brief and within the scope of this post.
“Seasoning” cast iron basically means coating it with cooking oil and baking it. Doing so creates a “season” on your cookware that prevents corrosion and creates somewhat of a non-stick surface for your food to cook. Over time, the seasoning can get stronger and stronger if you cook a lot of oily or greasy foods. If you use it for acidic or non-oily things, you will not add to the seasoning and may, in fact, erode the existing seasoning.
In any case, it’s absolutely necessary to make sure your cast iron is seasoned properly before you begin cooking with it. You will have a bad cast iron experience all around if you don’t!
Some Dutch oven companies market their products as “pre-seasoned”. This sounds very convenient, but I have found that even these pre-seasoned pots and pans still need to be seasoned before use. I’ve ordered new, pre-seasoned pans that somehow already have rust on them. The seasoning may look splotchy, bubbly, or just otherwise inadequate. I generally advise fully seasoning any new cast iron you buy, even if it claims to come already seasoned.
Necessary Dutch Oven Tools/Accessories
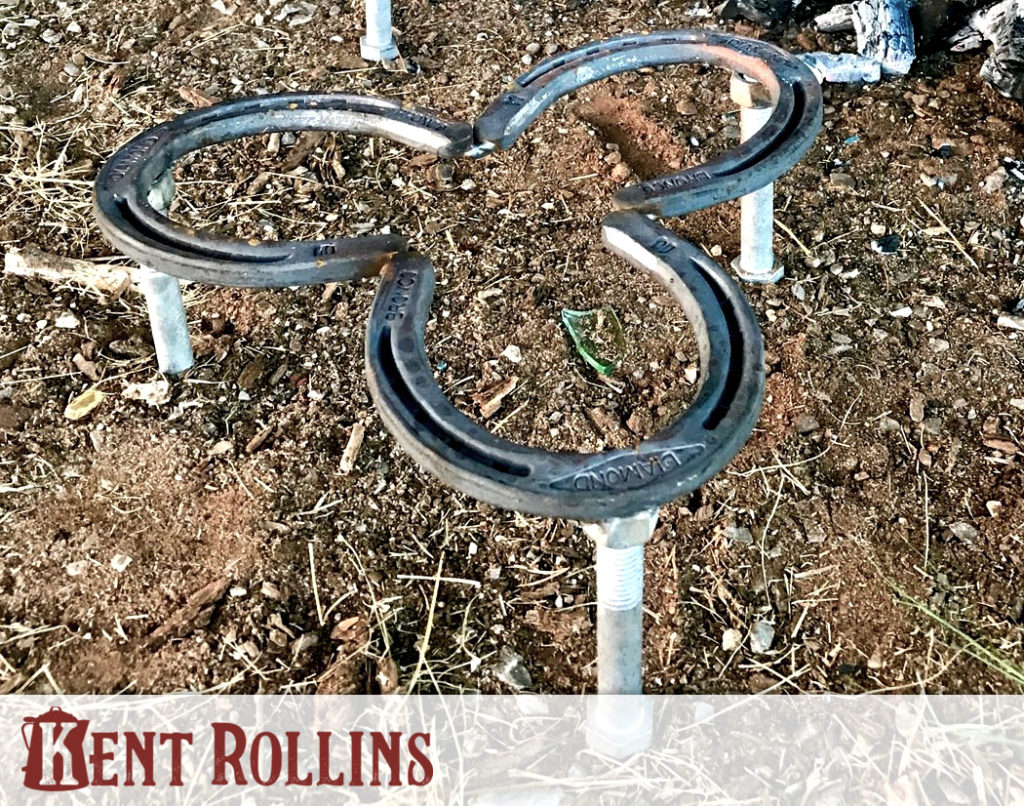
Dutch Oven Trivet
When shopping for a Dutch oven, you will see some that have legs and some that have just a smooth bottom. Either works fine, but you will need to get it up off the ground in order to place hot coals underneath. The models with integrated legs work for this, but are often quite short and stubby. Sometimes you need to get the oven a bit higher off the ground for heat control. Because of this, I always place the entire Dutch oven atop a metal riser called a Dutch oven trivet. I highly recommend this Dutch oven trivet sold by Cowboy Kent Rollins. It comes with interchangeable legs of two different lengths. You can place a legged Dutch oven on these trivets just fine, and the same goes for a smooth-bottomed/legless oven.
Lid Lifter
Without the proper tool, removing or turning your Dutch oven lid is messy and dangerous. You’ve got a screaming-hot, heavy cast iron lid loaded with hot coals. You need to be able to handle that lid without burning yourself and without letting any coals or ash fall into your food. A proper lid-lifting tool is considered a must-have. You can find some tools that simply hook under the lid’s handle, but these are inadequate in my opinion. With this style, your lid can still sway and pivot and dump coals into your Dutch oven (thereby ruining your food!). The proper style of lid lifter has an articulating hook and two prongs. When used correctly, you can keep a firm and secure grasp on the entire lid without any sort of tipping or swaying.

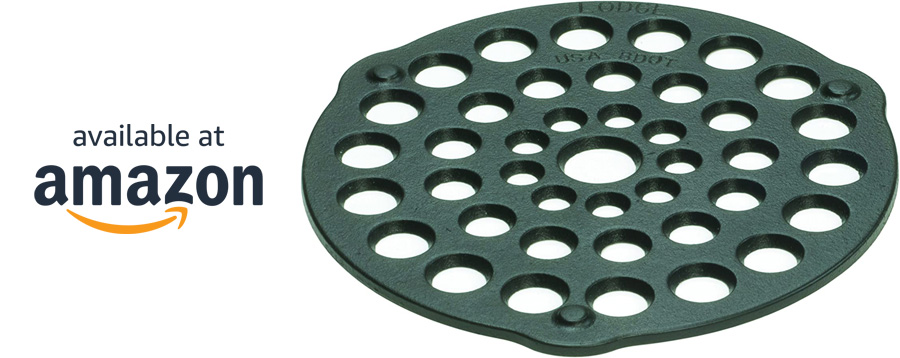
Roasting Trivet
Not to be confused with the Dutch oven trivet mentioned above, a basic roasting trivet is simply a short, cast iron platform that goes inside the oven. Roasting trivets are especially useful for meats, where you want to elevate your food just slightly. This is done to get the meat away from the floor of the oven to help prevent burning, and also to allow juices to drip just a bit. This item isn’t generally used for things like breads, biscuits, stews, or casseroles. But for pot roast, chicken, pork loin, or any meats you aim to “roast,” it’s a great tool to employ.
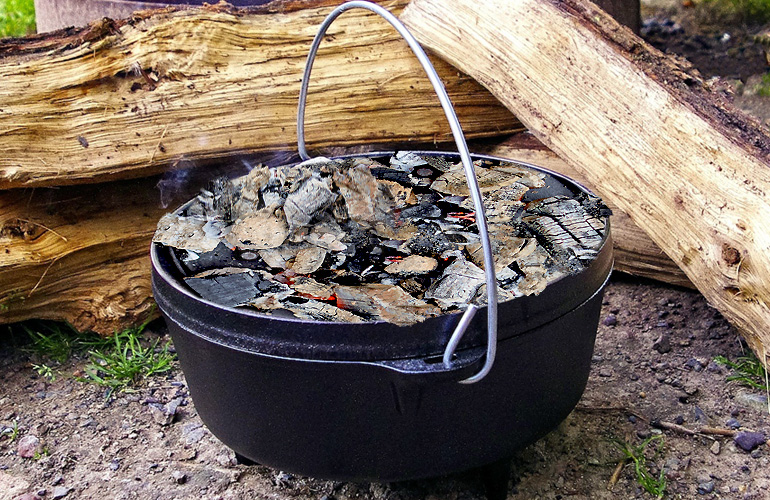
Coals and Heat Distribution
A Dutch oven is heated from coals beneath it and coals sitting atop it. Because your food is sitting on the floor of the oven, you must be careful about too much heat directly underneath. If it gets too hot under there, you will just end up frying your food like a skillet. Therefore, most of your heat should come from above (on top of the lid). Because there is space between the lid and your food, this allows it to bake rather than fry. You do, however, still need heat on the bottom so your food will be cooked all the way through. A good way to position the lower coals is to spread them out on the ground around the outer perimeter of your oven. It will heat the bottom side of the oven, but not so directly that it causes frying.
As I said, heat control in Dutch oven cooking isn’t an exact science. It takes a little practice and experience, but paying close attention to your Dutch oven while its cooking is key. You’ll probably need to add new coals partway through your cook. You’ll likely need to rearrange some of the coals partway through. Rotating the oven and lid at regular intervals helps even heat distribution from your coals.
Rotating the Oven
Try as you might, it’s not likely that you will distribute your hot coals perfectly evenly around the top and under the bottom of your Dutch oven. Therefore it’s an important step to periodically rotate. Use that handy lid lifting tool and turn the lid 180 degrees. Be very careful not to actually lift the lid up at all when doing this, to make sure no ashes can fall in. Then, using the wire handle on your Dutch oven, turn the entire oven 180 degrees.
Now you have effectively moved the top coals and bottom coals to the other side of your food. There is no exact time interval that this must be done, but my rule of thumb is about every 15 minutes, or at least once halfway through the cooking time (whichever is shorter).
Adding Fresh Coals
Your cast iron oven will retain a lot of heat, but you don’t want to let it cool in the middle of baking something. If your coals begin to look “dead,” you will need to grab that shovel and add some fresh coals. Unless you only have a minute or two left before your food is done, don’t just let a pile of ash sit there on your oven (because it’s not doing anything at that point).
The time to apply new coals can also a good time to check your food for doneness, even cooking, etc. If removing the lid, do so carefully and then shake your dead ashes off the lid well away from your oven (you don’t want ash falling in there). If it looks like your food needs a little more/less heat on the top/bottom, be sure to distribute and position the new coals accordingly. If your top is too cooked but the bottom isn’t, put very few coals on top but a bit more underneath.
Rearranging Coals
If it’s not time to add fresh coals but you’ve checked your food and it looks like it may be cooking unevenly, you can (and should) still rearrange some coals at this time. For the most part, you will cook with more coals on top and fewer underneath. But if you’ve finding that the top of your meal is way overcooked, you may have to remove all of the top coals. This is why paying close attention and checking your food regularly is vital, because it allows you the opportunity to move some coals around earlier and course-correct, rather than scrambling to try and salvage a burnt dish after it’s too late.
Cleaning Your Dutch Oven After Use
Depending on what you’ve just cooked, cleanup could be very easy or take a little time. The golden rule of cleaning cast iron is that you want to get the food grime off without stripping the precious seasoning. You can scrub cast iron, but use a brush that is not especially abrasive. Unless you intend to completely re-season, don’t use steel wool or other harsh, abrasive scrubbers.
It used to be widely-said that you should never ever use soap of any kind when cleaning cast iron. The experts have relaxed that stance to some degree, and many will now say that using a mild dish soap is just fine, as long as you don’t scrub too hard or with something too abrasive.
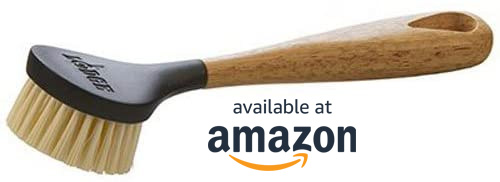
After cooking, let your cast iron cool down enough to handle. Use some paper towel to wipe out the bulk of the food gunk in there. At this point, you have a couple options. When I’m at home, I just use hot water from the sink, some Dawn dish soap, and a soft-bristled plastic brush. When I’m out in the woods, I will usually fill it halfway with water and heat it to a boil. A gentle scrub from a bristle brush usually gets the vast majority of old food out of it. When I get home from the woods, I will usually do one cleaning with dish soap.
Regardless of which way you’ve cleaned your cast iron, be sure to dry it very thoroughly with a towel. Don’t just set a sopping wet piece of cast iron on the counter and let it drip-dry. You will end up with surface rust. Take that handy dish towel or some paper towels and pat every square inch dry. Get every nook and cranny.
No discussion about Dutch oven cooking would be complete without a shout-out to Cowboy Kent Rollins. If you’re interested in learning everything there is to know about Dutch ovens and cast iron cooking, he is the guy. Kent taught me much of what I know, and I recommend checking out his authentic cowboy cooking channel on YouTube if you haven’t already.