Common Food Preservation Methods Explained
This post is all about the common food preservation methods we regularly employ here at the Great Lakes Prepping bunker. I use all of these methods to some extent, though some a lot more than others. If you’re not entirely familiar with the different ways in which you can make your food last longer, read on!
I’ll mention a few things about each one as far as resource that are needed, and approximate storage time for that method.
Freezing
The first and probably the most common among pretty much everybody these days is freezing. There’s not a lot of explanation needed here. You freeze it and it lasts longer. You’re preserving it basically by lowering the temperature and making it mostly impossible for things like bacteria to grow in it. I would consider this a medium to long storage option.
It’s generally suggested that you freeze something like meat for no longer than about 6 or 12 months. But it will be perfectly safe to eat far beyond that, as long as it’s never thawed, and has consistently stayed at 0 degrees F or lower. After a year or more, you may begin to lose some texture or flavor, and even possibly some of the foods nutritional value. You can get the longest life out of your frozen foods by wrapping or sealing it very well. Using vacuum-sealed bags is a great way to keep freezer burn away.
Freezing of course requires a fair amount of constant electricity. In terms of prepping, lots of electricity constantly is something that we tend not to consider reliable if if the grid goes down. If it does, it’s going to take a lot of resources to run a freezer (solar panels, battery banks, etc).
As I mentioned, there’s some impact to texture and taste. If you freeze meat and then thaw it out, it will be pretty close to the same as it was when you put it in the freezer (if used in a reasonable amount of time). But when you freeze certain vegetables, fruits some other things, it’s going to change the texture to the point where you are limited in what you can really do with it. You can’t freeze a tomato and expect that it’s going to be like a fresh tomato after its thawed out.
With freezing, there’s minimal impact to nutritional value. Everything’s basically stuck in just about the state that it was in before you froze it.
I’ll also mention a cost range for each of these methods and that’s generally that the price you would need to spend to get started using this preservation method.
Storage Time: Medium to Long Term
Resources Needed: Moderate amount of constant electricity
Taste/Texture: Some impact to taste and texture
Nutritional Value: Some impact
Cost to Get Started: $200-$1,500
Pretty much everybody already has a fridge with a freezer in it. If you wanted to freeze on a larger scale you’d probably need something like a chest freezer, and a
chest freezer runs anywhere between $200 and $700 and and up (depending on the size you want and the brand, quality, features, etc).
Canning
In the simplest terms, canning involves using heat to seal foods in liquid so they are safe to store on a shelf without refrigeration. This can include hot water bath canning or pressure canning. There’s also a method called steam canning that I’ve never personally dealt.
Canning would generally have a medium to long storage time. About six to twelve months is the recommended range for most home-canned goods. Though some people definitely go longer than this with their canned goods, I don’t personally keep something that I’ve canned for longer than about twelve months.

So what’s the difference between hot water bath and pressure canning? Basically, hot water bath involves boiling your filled jars in water for awhile. This is fine for high-acid foods like tomatoes, pickles, etc. Pressure canning involves using temperatures that are higher than that of boiling water to safely sterilize the food for shelf-stable storage. Pressure canning is required for foods that are not especially high-acid, such as meats and low-acid vegetables. With high acid foods, there is not as much of a concern for things like Botulism to grow, so the temperatures don’t need to be quite as high.
Quick Tip: Don’t screw around here! If your food items must be pressure canned, pressure can them. Botulism will kill you. It’s hard to screw up hot water canning, but you should know exactly what you’re doing if you intend to pressure can low-acid foods.
Resources required for canning is a lot of heat (and therefore fuel for heat). It takes a lot of heat to keep the water hot for the time required. But you only need to do it once for a batch of jars, and from there you don’t need electricity or fuel after the canning is done.

With canning, there’s some impact to texture and taste, in the same way that cooking would ordinarily affect the texture and taste of a food item. There’s some impact to nutritional value (but again, only in the same way that there would be in cooking your food ordinarily).
Storage Time: Medium to Long Term
Resources Needed: Large amount of heat initially
Taste/Texture: Some impact to taste and texture
Nutritional Value: Some impact
Cost to Get Started: $100-$600
Depending on what kind of canning you want to do, you could expect to spend anywhere from $100 to about $600 on equipment the the jars all the little gadgets you need. Obviously if you’re pressure canning, you need a more expensive piece of equipment than if you’re just hot water bath canning.
Dehydrating
Dehydrating involves using heat and air to remove moisture from your food, thereby allowing it to last longer. This method ranges from long too very long storage time. Five to 20 years, depending on what you’re dehydrating. There are a lot of vegetables that I’ve dehydrated that I’m comfortable leaving sealed for between 10 and 20 years.
This requires a moderate amount of electricity initially. There’s ways to dehydrate in an oven, but I’m generally talking about using an electric dehydrator.
There is moderate impact to texture and taste, as well as nutritional value when you dry foods out. You’re going to remove some of the vitamin value from it, and texture and taste will never be quite the same even after rehydrating.

When you dehydrate a vegetable, you can rehydrate it for the most part. But with a lot of vegetables it’s not going to be exactly the way it was when it was fresh. They’ll still be good, but it won’t be quite the same as fresh or even frozen,
Storage Time: Long to very long term
Resources Needed: Moderate amount of electricity initially
Taste/Texture: Moderate impact to taste and texture
Nutritional Value: Moderate impact
Cost to Get Started: $50-$500
A dehydrator, depending on the size and brand and quality, can run you anywhere between $50 and $500 (or more).
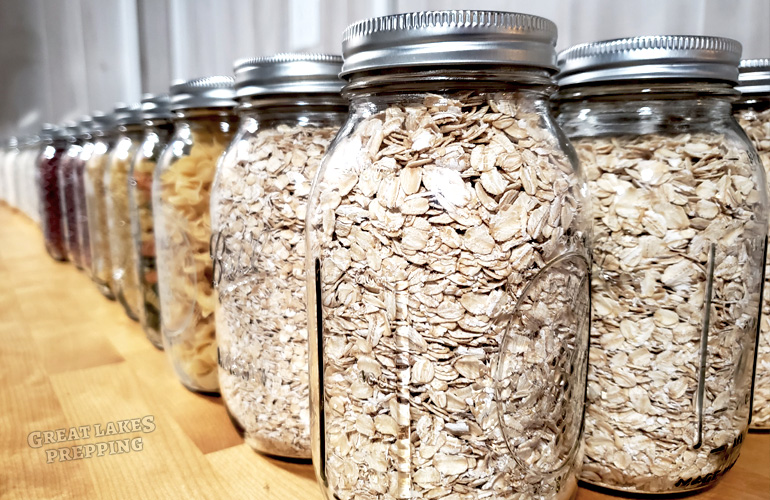
As a side note, dehydrating food and dry-canning go hand-in-hand. While dry canning is more of a storage method than a preservation method, I’ll mention it briefly because one complements the other so well. All of my dehydrated vegetables, fruits, and grains are then dry-sealed in mason jars with the use of a FoodSaver machine. Learn about vacuum-sealing food in a mason jar here.
Freeze-Drying
kind of the “big brother” to dehydrating is freeze drying. Freeze drying is also removing all the moisture from food, but instead of using heat and air you’re using a process called sublimation. Using freezing temperatures combined with vacuum turns turn ice crystals directly into gas. Evaporating directly from ice skips that liquid step. that’s what sublimation means, and in doing this you can preserve the texture and the taste and the nutritional value very well.
If you dehydrate a Ice Cream Sandwich, you’re going to melt all the ice cream and be left with nothing but a great big mess. However, if you freeze dry an Ice Cream Sandwich, what you end up with is something that looks exactly like an Ice Cream Sandwich. It’s just it’ll be very light and brittle. It will have the consistency of that “astronaut” ice cream you may have seen.
The same goes for meats, vegetables, fruit, and more. With freeze drying it’s going to look almost exactly the way it did before. When you re-hydrate with water, most freeze-dried foods will return very closely to how they were before freeze-drying (not sure how that ice cream sandwich would fare if dunked into water).
All of the commercially-sold freeze emergency foods like Mountain House are freeze-dried. They last a very long time and keep most of their taste, texture, and nutritional value. Properly packaged, freeze dried foods can be safe and tasty for up to 25 to 30 years.
The obvious drawbacks to freeze-drying is the expense and the resources it requires. A freeze-drying machine is quite pricey and uses a very large amount of electricity. The machine is basically a heavy-duty freezing element and a vacuum vacuum pump that has to run constantly for many hours at a time.
Storage Time: Very long term
Resources Needed: Large amount of electricity initially
Taste/Texture: Minimal impact to taste and texture
Nutritional Value: Minimal impact
Cost to Get Started: $2,000-$12,000
Freeze-drying machines can cost anywhere between $2,000 and $12,000 for the kind of machine that you could fit in your home. They make small “home versions” of freeze dryers for around two thousand dollars for the smallest one. It doesn’t hold a lot of food per batch, so you’ll have to run it a lot to store up a lot of food. These machines also require somewhat routine maintenance to keep them running properly. They may need to be oiled and calibrated on a regular schedule.
Learning about what it takes to freeze-dry foods made it very understandable why store-bought freeze-dried food pouches can cost so much. For the amount of food that I keep on hand, I have found purchasing it to be more cost-effective by far than investing in my own machine (plus it’s hard to beat their factory-sealed packaging).
Curing, Smoking, and Pickling
These last three methods I’m going to group together into one section because they all have some similarities and are also among the lesser-often methods that I personally use.
Curing, smoking, and pickling can only be used for certain specific foods. Curing and smoking are limited mostly to meats, while pickling is limited to anything that is palatable after soaked in vinegar brine! With all of these methods there is significant impact to texture and taste, and moderate to high impact to nutritional value. These are basically unavoidable, as these methods generally involve using salt, smoke, and/or vinegar to preserve it. Those things are going to change the taste and nutrition a lot!
Curing and Smoking
Curing is using salt to leach moisture out of meats. Smoking is using smoke to leach moisture out of meats.
For curing and smoking with a very long-term storage in mind, you’re still going to need to refrigerate or freeze. There’s ways to cured smoked meats to where they can last on the shelf for quite some time, but I’m personally a little apprehensive about using those methods myself. I think there’s always sort of an inherent risk of food-borne illness when you do it that way. I know people have been doing for thousands of years, but I think a lot of that was out of necessity as that’s all they had. I think there’s better options for myself (plus I try to avoid eating tons of salt).
Pickling
Pickling is basically increasing the acid level of a food, thereby making it preservable. Pickling works with practically anything that you can soak in vinegar. A lot of stuff that you could pickle, you wouldn’t want to! I know you can have pickled eggs and pickled pig’s feet, but I’m sure not interested in either of those. For me, I pretty much stick to pickled cucumbers, peppers, and beets.
I’ll mention that with pickling, if you want it to be shelf stable then canning is still a necessary step. So pickling is kind of grouped into the canning method of food preservation. It’s just sort of a different kind of canning. You’re canning something in a vinegar brine, rather than tomato sauce or whatever the main ingredient is.

Pickling is a method that’s been used for for a very long time and it works very well for certain foods. As far as storage time, it’s pretty much the same time-frame as it is with home-canned foods. Around 12 months is a good rule of thumb.
Storage Time: Short to medium term
Resources Needed: Moderate amount of heat
Taste/Texture: Big impact to texture and taste
Nutritional Value: Big impact (mostly due to salt content)
Cost to Get Started: $50 and up
If you want to cure meats, you don’t need much except the curing salt. For smoking, you can fashion an inexpensive, makeshift smoker. Or you can buy an expensive, fancy smoker. For pickling, you mostly need the ingredients and the hot water bath canning equipment.
So that’s my rundown of the most common food preservation methods. There are of course some other methods that are less common, particularly in the United States. Fermenting, for example, is much more common in other parts of the world. It’s certainly used here, but I’m absolutely no fan of sauerkraut or kimchi so there’s not really any place for fermenting cabbage in my house!